Launch MySQL Instance on RDS
RDS is Relation Database Service running on AWS. It has a lot of advanced features such as Backup, Snapshots and Multi AZ Replication. In this document, We will have a look a MySQL Database Instance on AWS RDS.
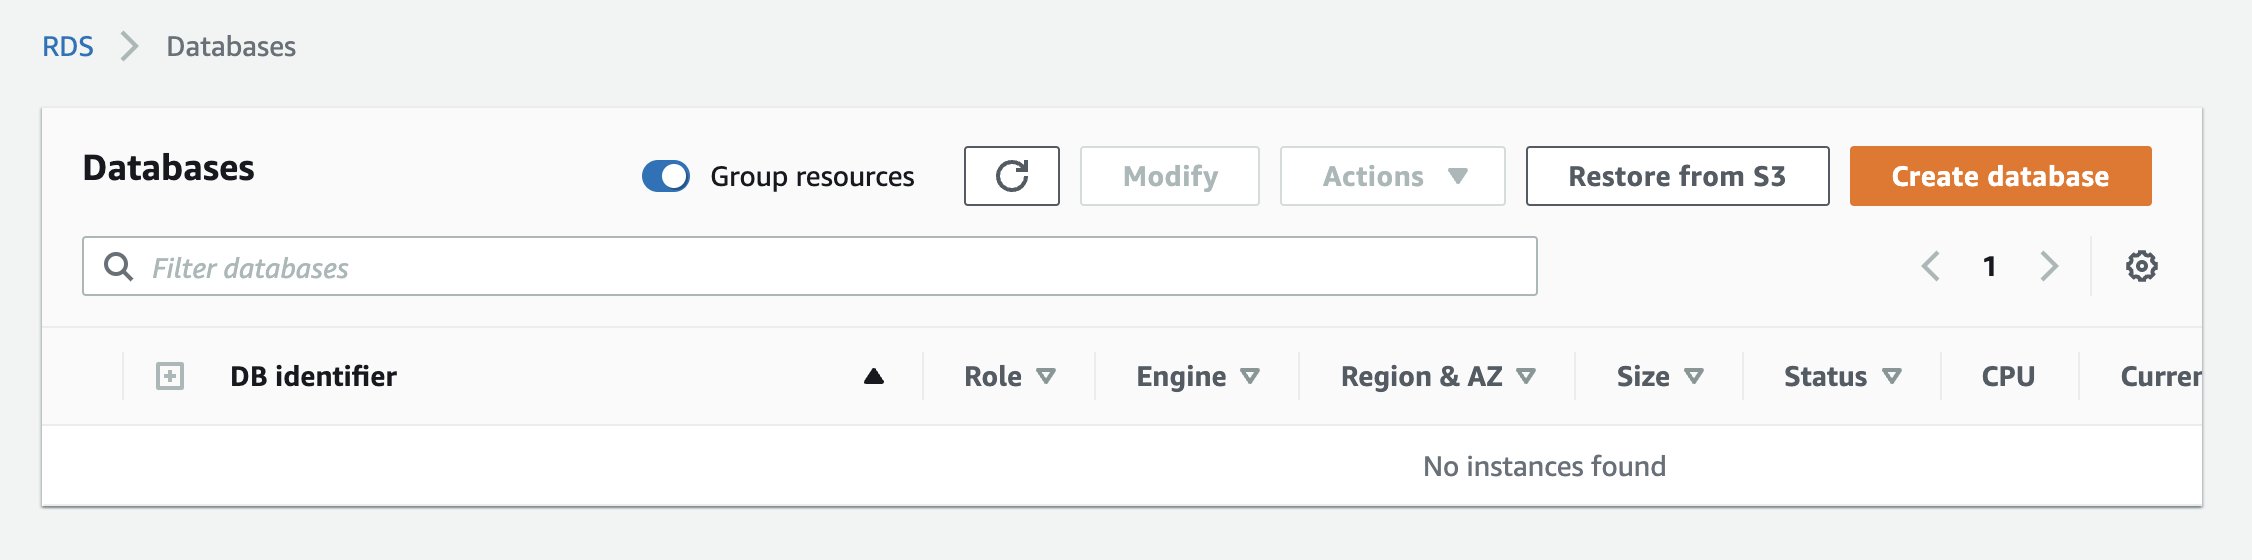
1. Navigate to RDS
First of you should log into the AWS Account and navigate RDS page. Then just click on Create Database in the top right corner.
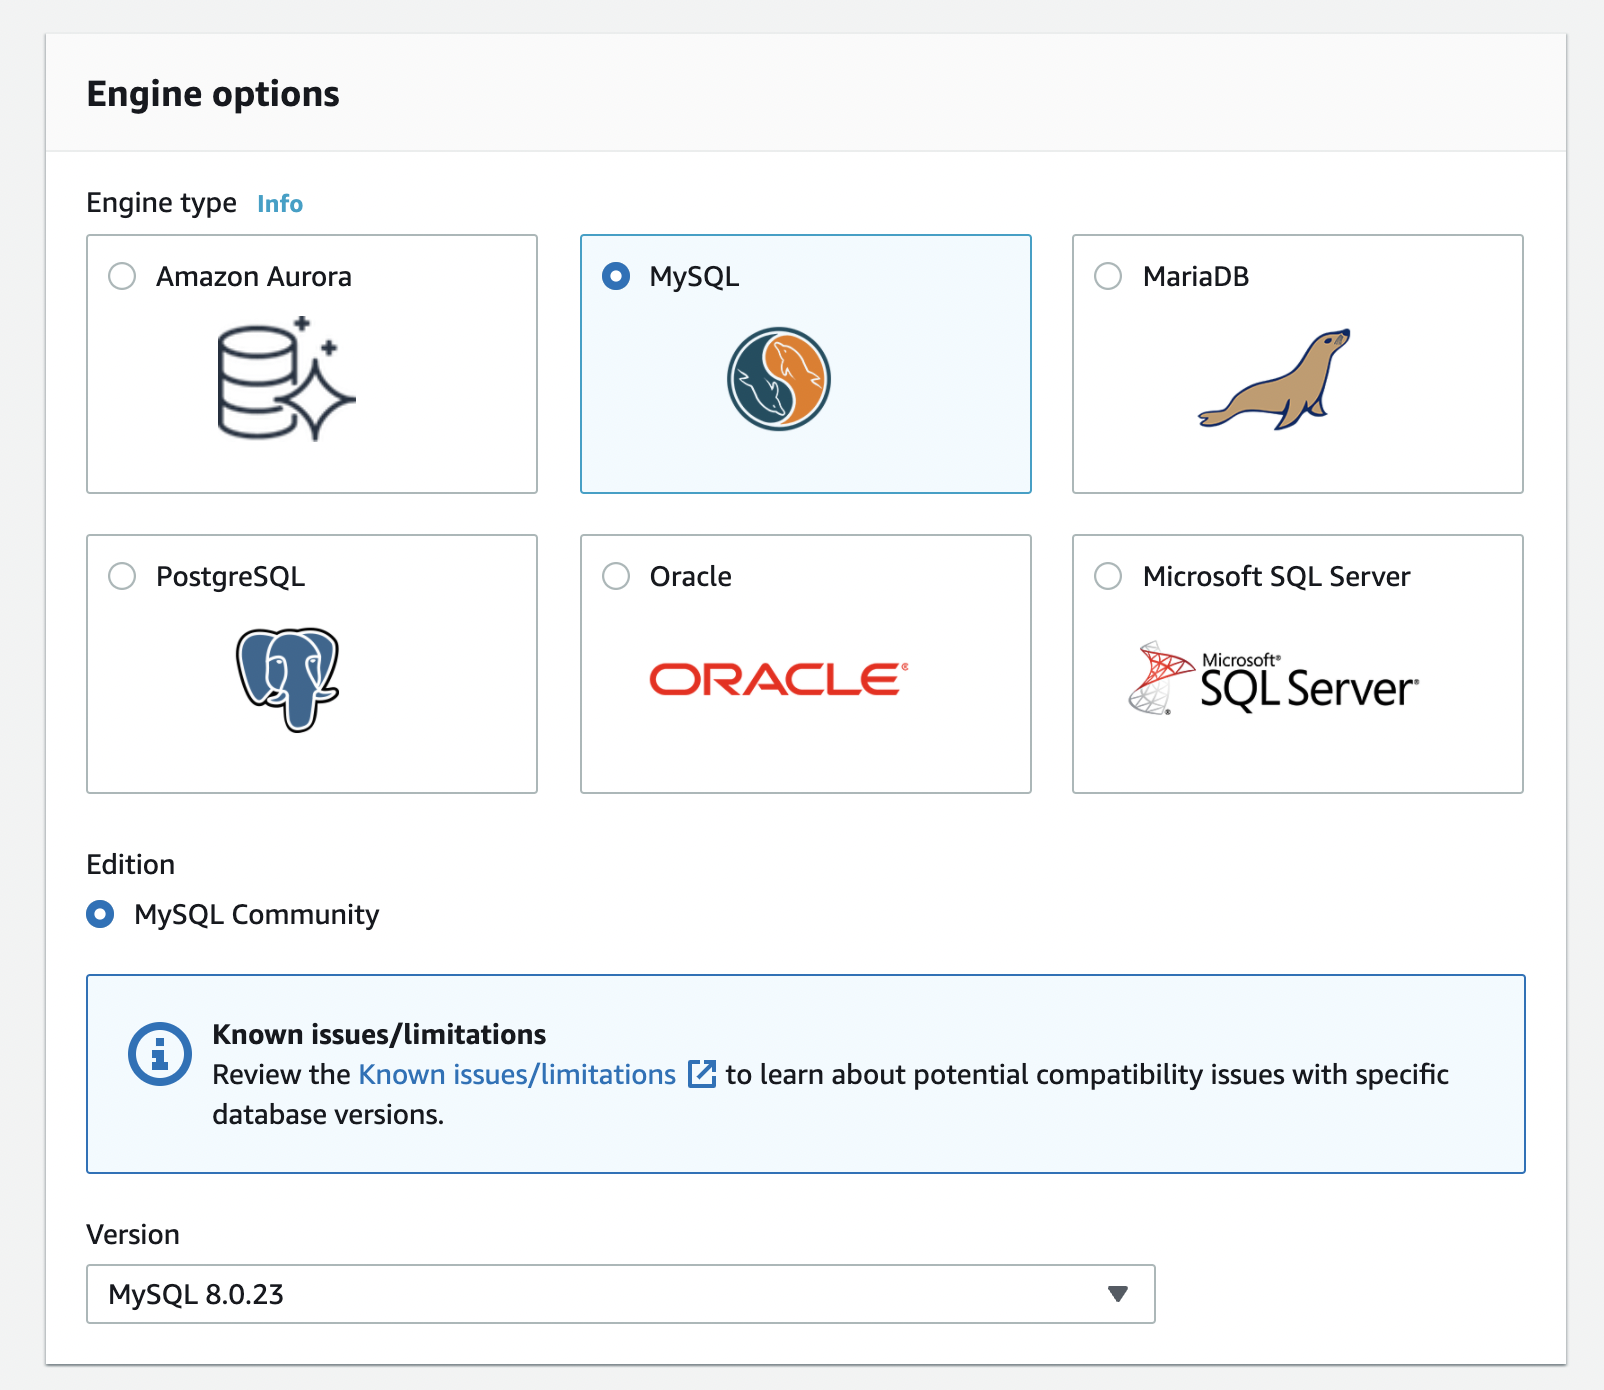
2. Choose The Engine
Once you open the create database window, You need to select the Database Engine. RDS supports 6 database engines.
- Amazon Aurora - High performance
MySQL/Postgresscompatible database engine. - MySQL - Standard MySQL database engine (Community Edition).
- MariaDB - Standard MariaDB database engine (Community Edition).
- PostgreSQL - Standard PosgreSQL ORDMS engine.
- Oracle - Multi Edition compatible Oracle database engine.
- SQL Server - Microsft SQL Server (2012, 2014, 2016, and 2017).
In our case, We need MySQL
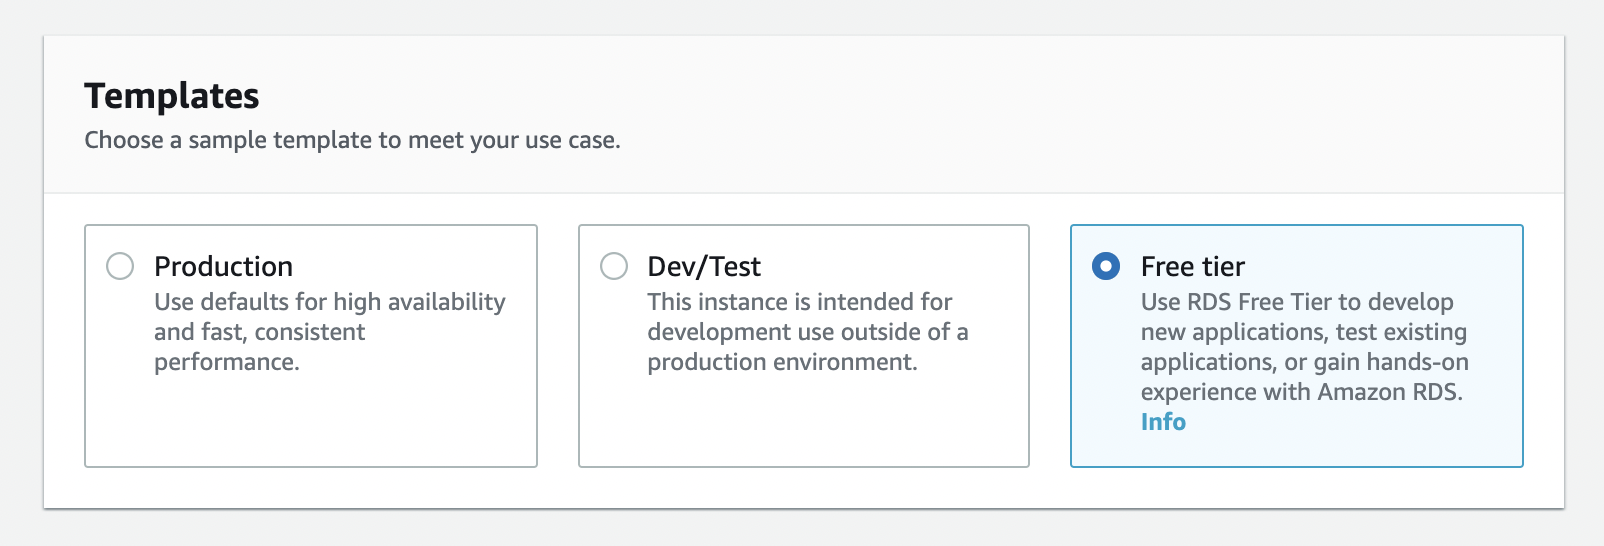
3. Select The Template
Templates are just preset configurations that will be applied to rest of the section. But still you can customize it. There are 3 templates.
- Production - Configurations for highly available production workload database.
- Dev/Test - Configurations for testing or development purpose.
- Free Tier - Cost and performance optimized low level limited configurations for AWS Free Tier.
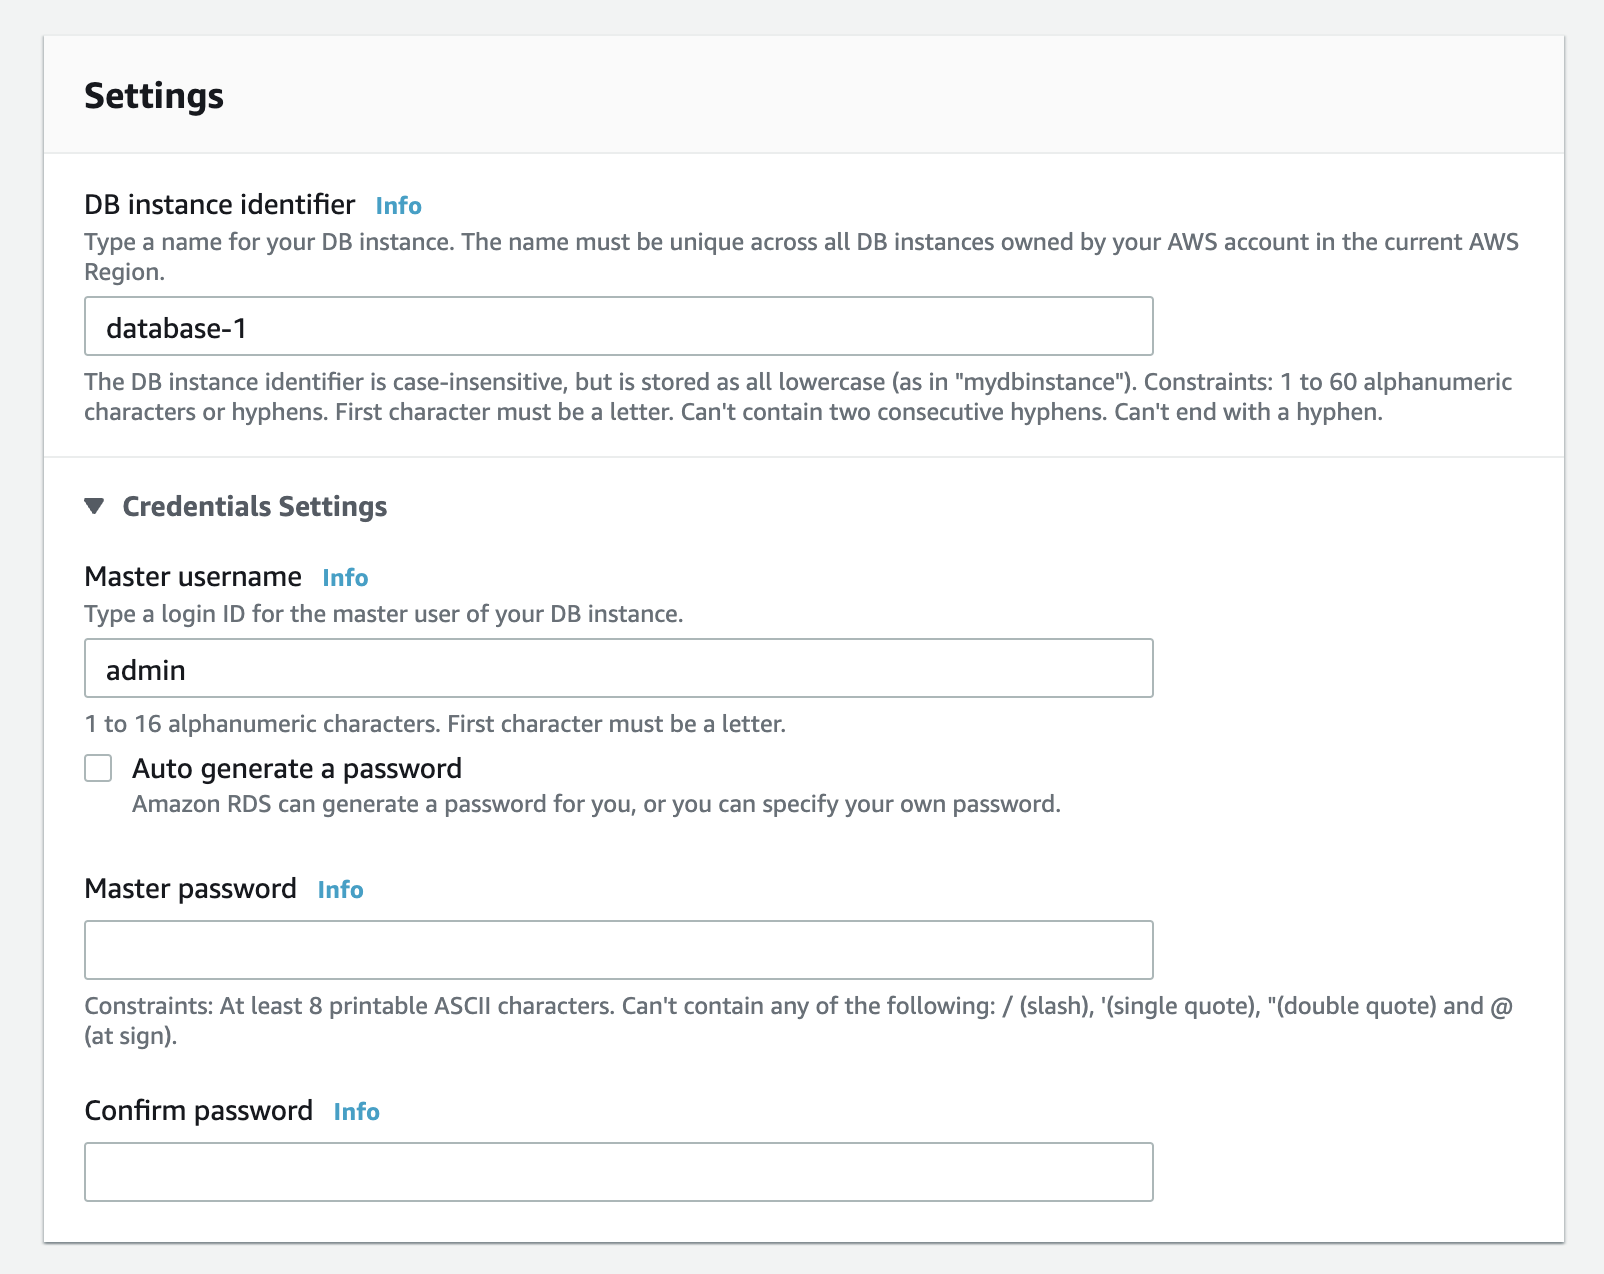
4. Setup Identifier & Credentials
This section has the settings for the instance credentials.
- DB Instance Identifier - It's just the name of the instance. Will be shown in RDS page.
- Master Username - It's the username of MySQL
Rootaccount. - Master Password - It's the password of MySQL
Rootaccount.
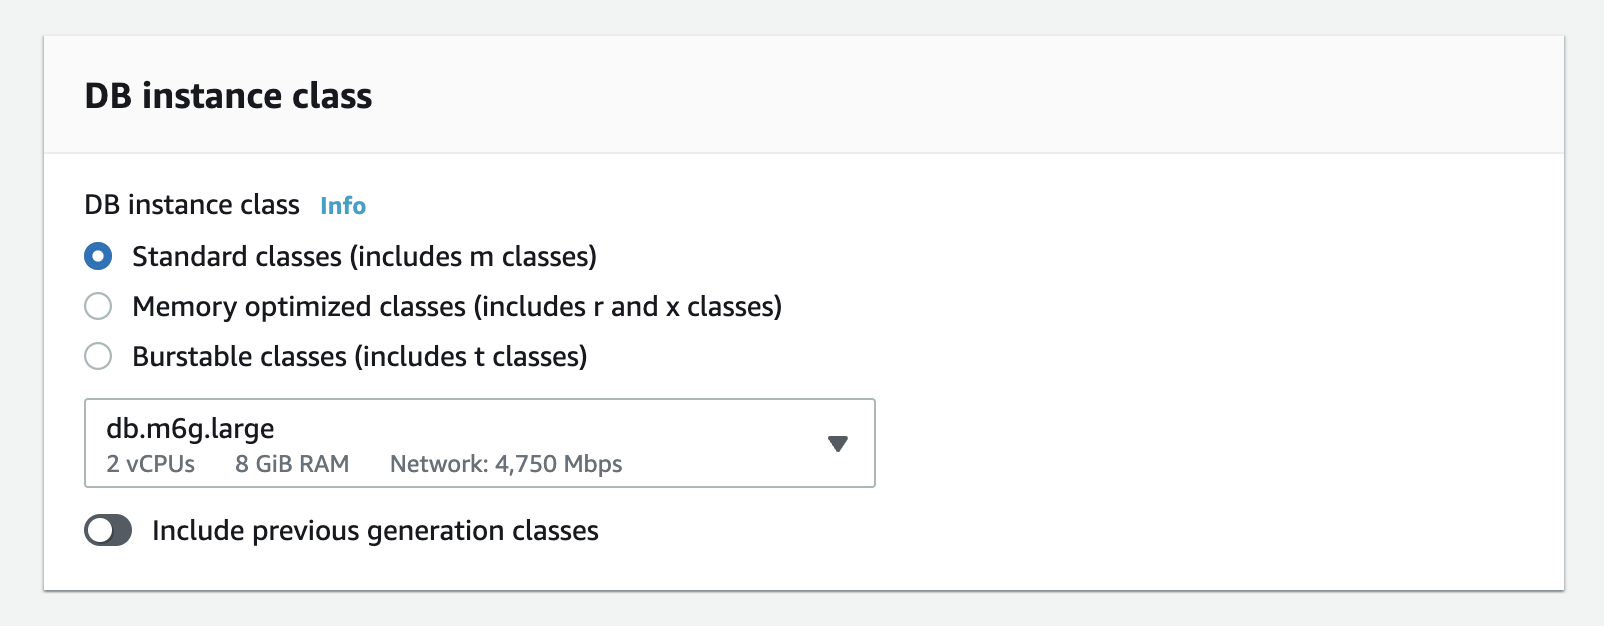
5. Select The DB Instance Class
In AWS instances are classfied based on vCPUs, Memory and other factors. You need to choose the correct instance type that suits to your requirement.
Checkout all the AWS RDS Instance types here
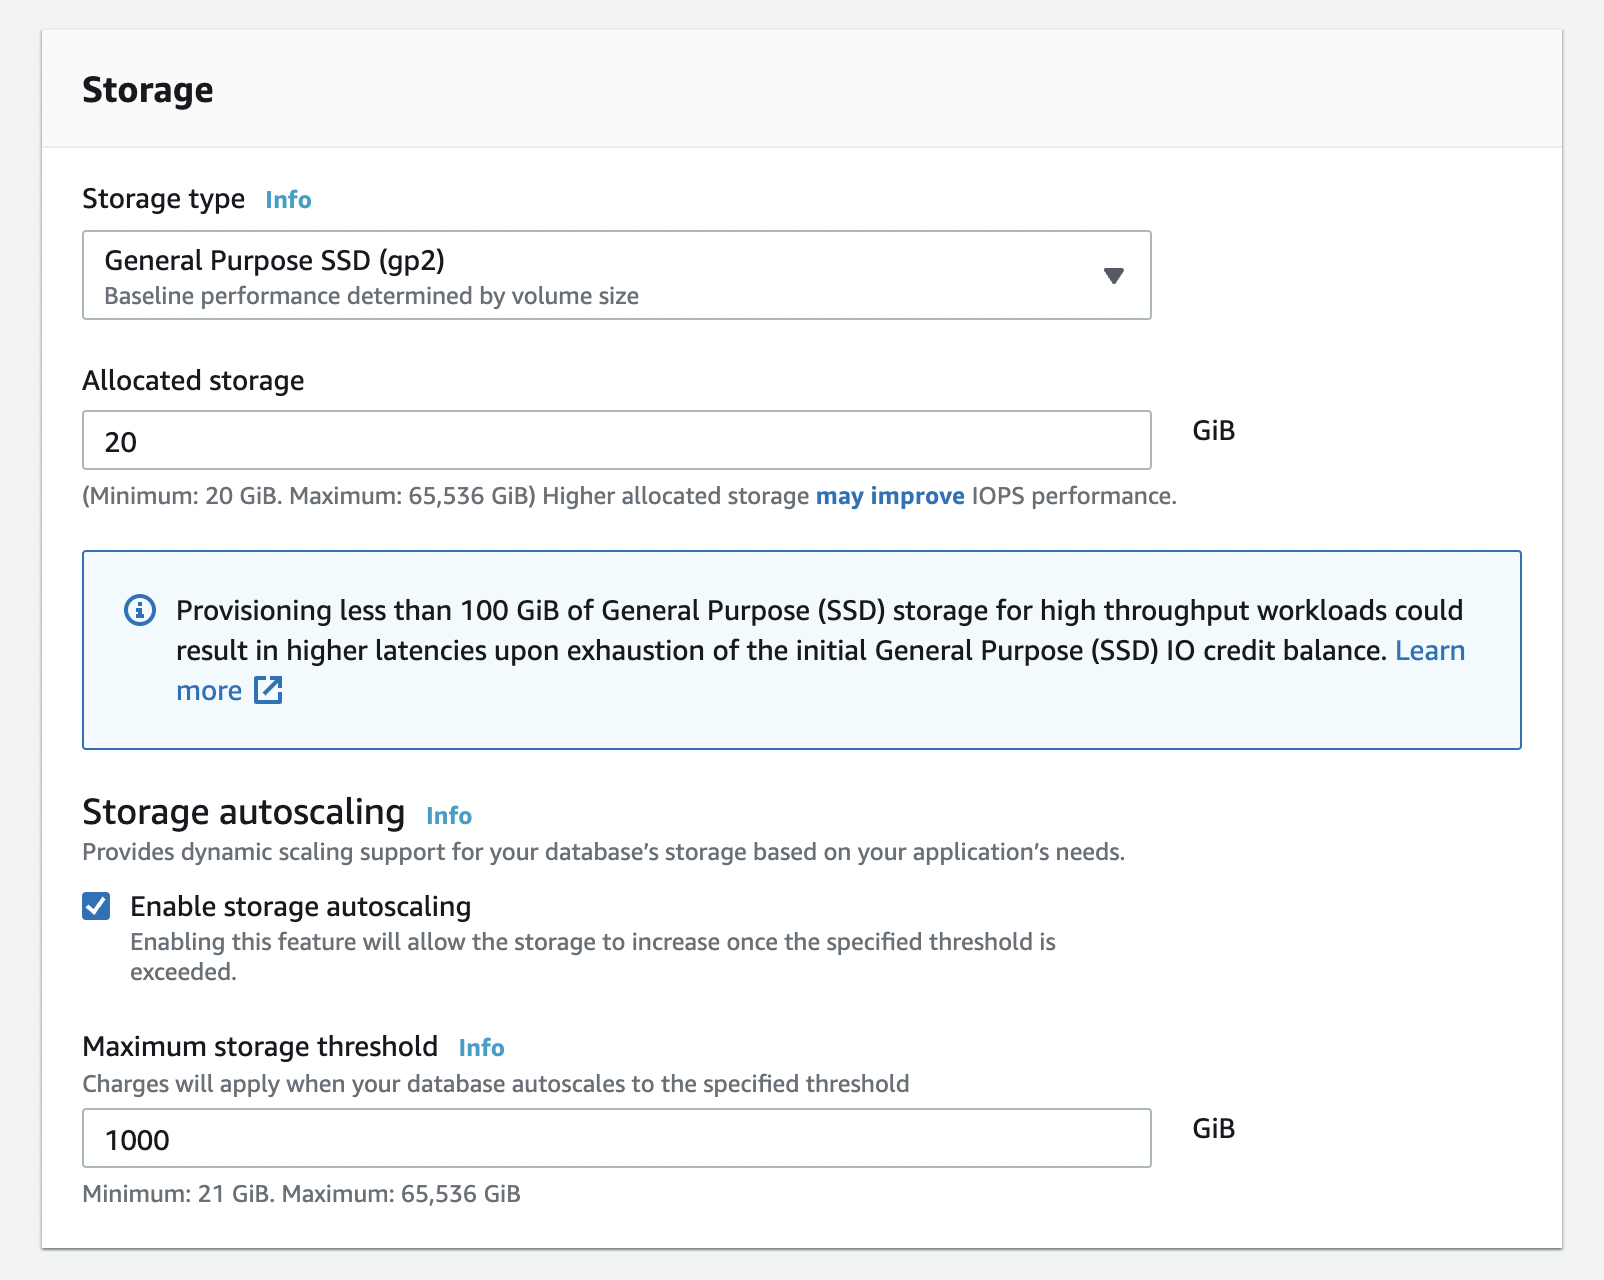
6. Choose The Storage
Once you selected the instance class, You need to choose the Storage Type, Capacity and Autoscale options.
- Storage Type - Type of the disk. There are 3 options
General Purpose (SSD),Provisioned IOPS (SSD)andMagnetic. - Allocated Storage - Capicity of the disk in GiB
- Storage Autoscaling - If the instance running out of storage, It will automatically scale up the capacity.
- Maximum Storage Threshold - Maximum storage threshold required by planned workload of the DB.
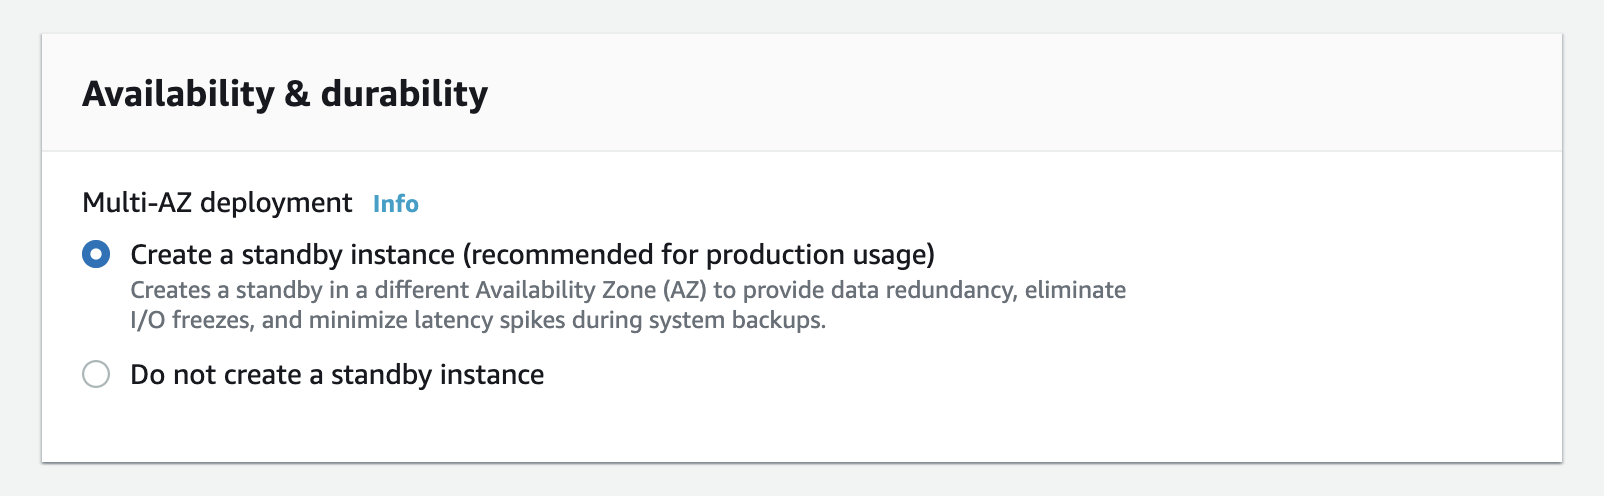
7. Setup Availability & Durability
This option is important to production databases to increase the availability.
- Create a Standby Instance - Will replicate database across
Multiple Availability Zones.
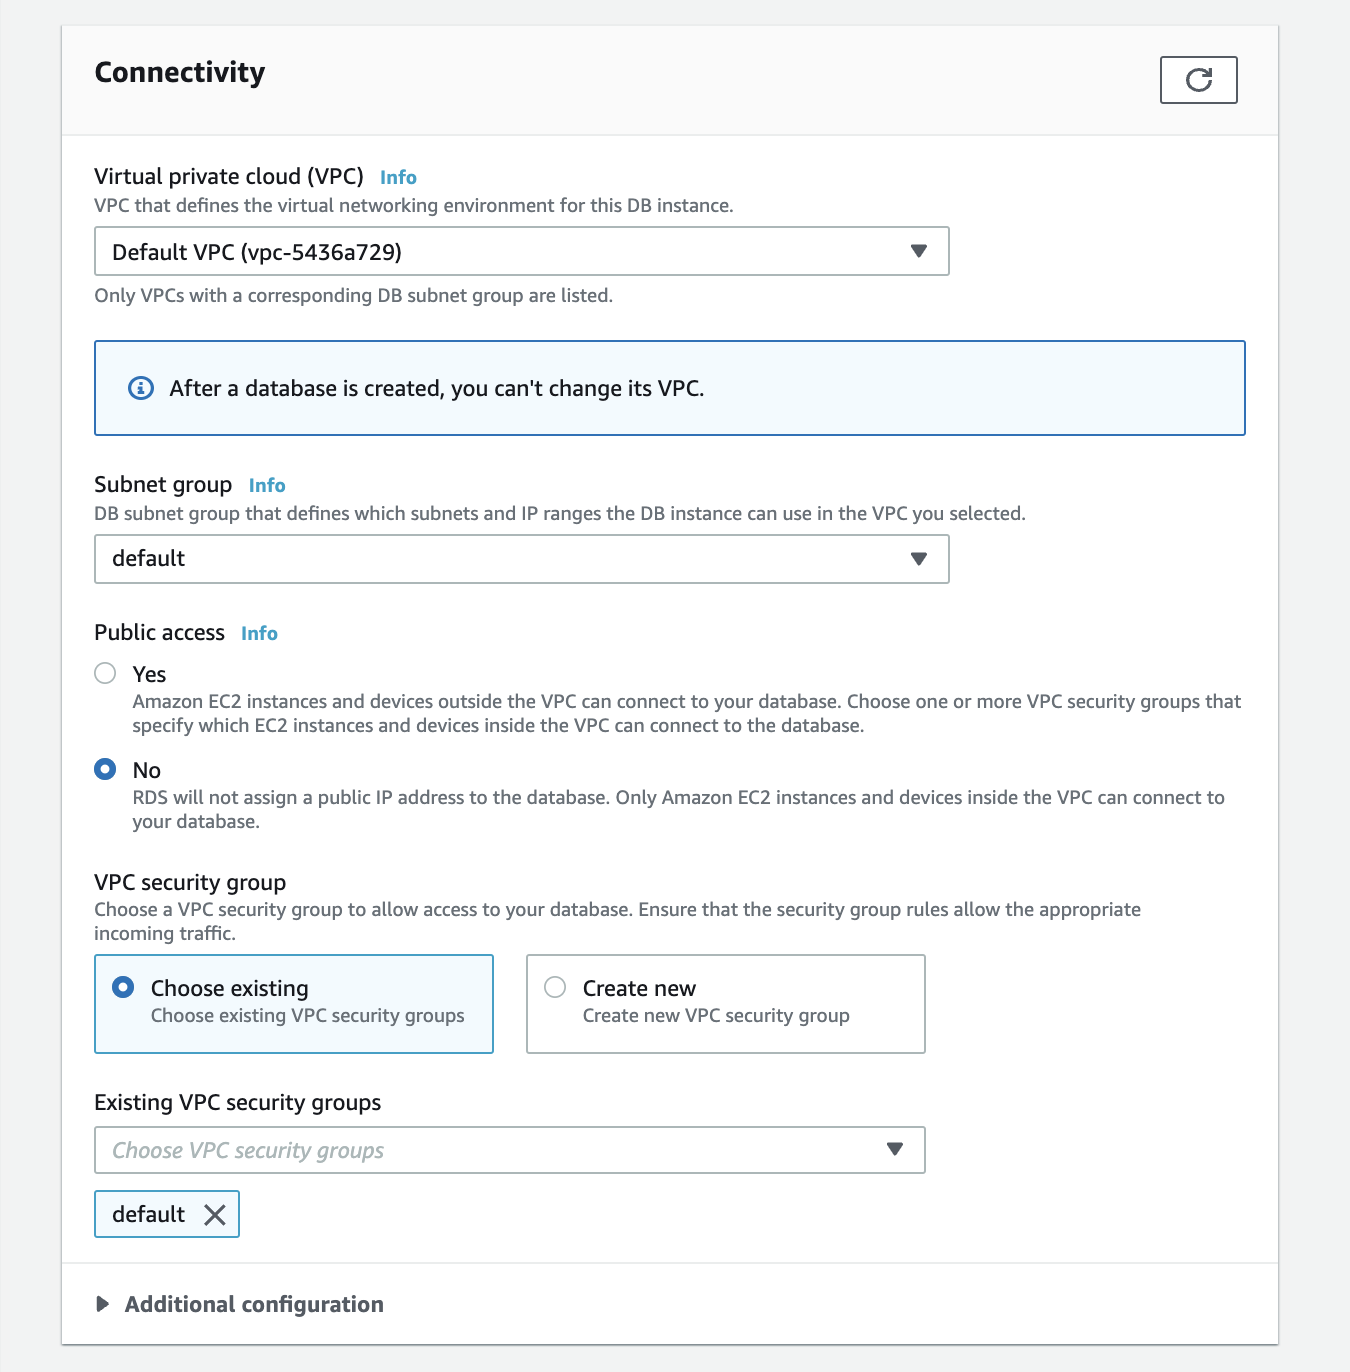
8. Configure Instance Connectivity
In this section you need to configure the network of your instance. By default the RDS instance will be created in the Default VPC.
- Virtual private cloud (VPC) - The
VPCwhere you need to create the instance. Instead of default, You can create newVPC. - Subnet Group - The
SubnetinVPCwhere you want to place this instance. DefaultVPCwill have defaultSubnet. - Public Access - If you enable this, The instance can be accessed from the outside of the
VPC. Otherwise, The instances inside theVPCcan access the instance. - VPC Security Group - This controls the
Incomming Trafficof theVPC. You can use default one or you can create new. - Availability Zone - The
AZwhere you want to place the instance.AZs are based onRegions.
9. Save & Launch The Instance
Once you configure all the required settings. You can launch the database by clicking on Create Database. It may take few mins to be provisioned.
10. Connect The Database
Once your database created. You can see a lot of information about the instance. In Connectivity & Security section you can find the Endpoint and port to access your database.
Then you can connect your database through your Application, MySQL Client or MySQL CLI
>> mysql -u USERNAME -pPASSWORD -h ENDPOINT
